---
title: "Docker & Joomla"
format: html
theme: darkly
number-sections: true
include-in-header:
- text: |
- text:
---
by [Marc Dechèvre](https://www.woluweb.be/)

 Present slides:
This presentation was made at
- JoomlaDay France 2024 #jd24fr
## Introduction
So many times I have seen people struggling on forums or elsewhere to configure a "local server".
Actually, Docker is really the way to go because
- it is not only an easy & cool way to set up a "local server" to play / work with Joomla
- but once you can use it, you realize that it allows to set up any kind of tool / environment in less than 1 minute, without worrying for conflicts / versions / whatever
## Demo
### Prerequisite
Let's suppose you have already installed **Docker Desktop** (or **Docker Engine** if you don't wish/need the Graphical User Interface).
See the detailed installation procedures hereafter.
### Example 1
See the corresponding video:
As you can see, basically all it takes to get a Joomla website running locally is
- one little configuration file that you copy paste
- one command line
[](https://youtu.be/-4WXIXQJWTU)
#### Have Joomla up and running
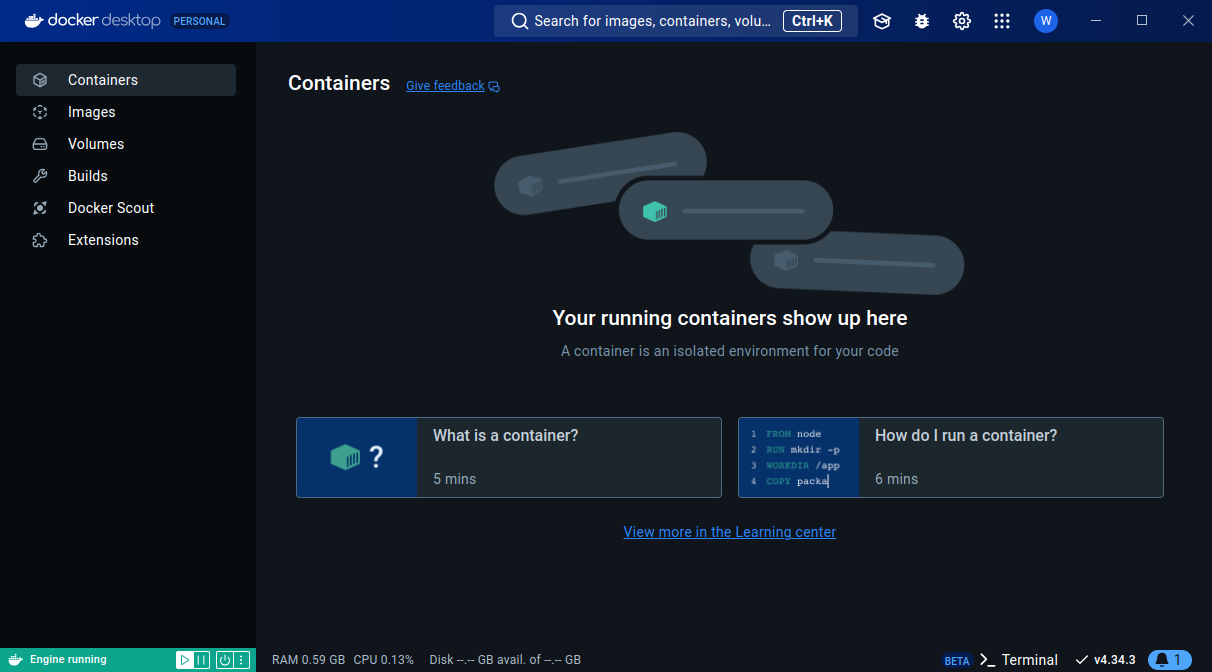
0. Open Docker Desktop
1. Go to the Official Image for *Joomla* on the Docker website:

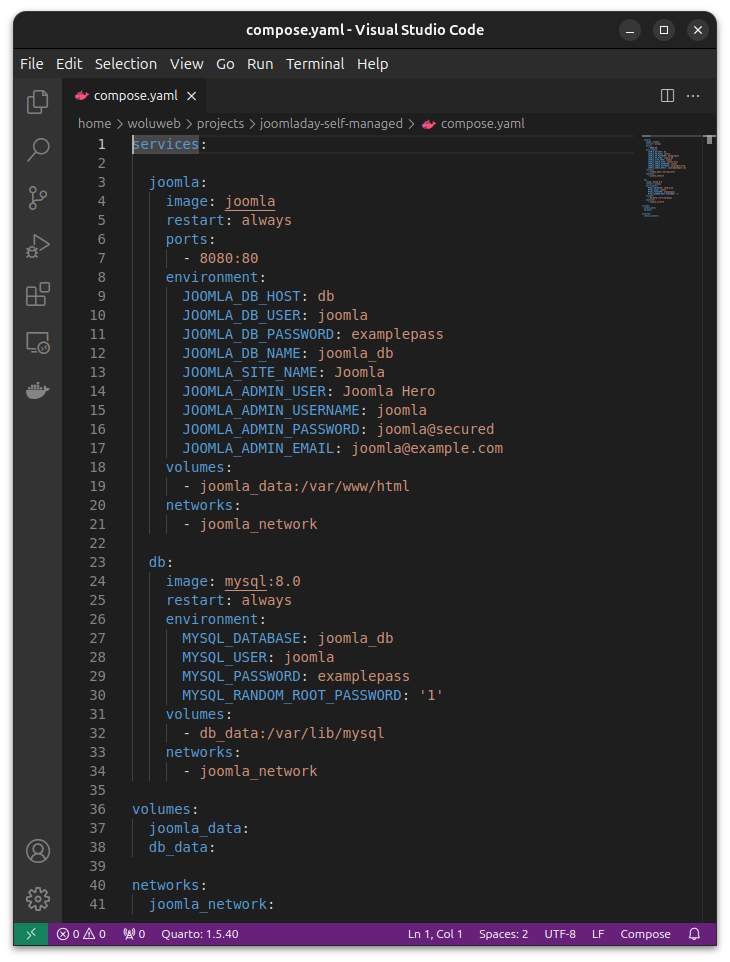
2. Copy the `docker-compose.yml` example and save it in a local File called `docker-compose.yml` (or better: `compose.yaml` which is the latest standard) in a newly created Folder

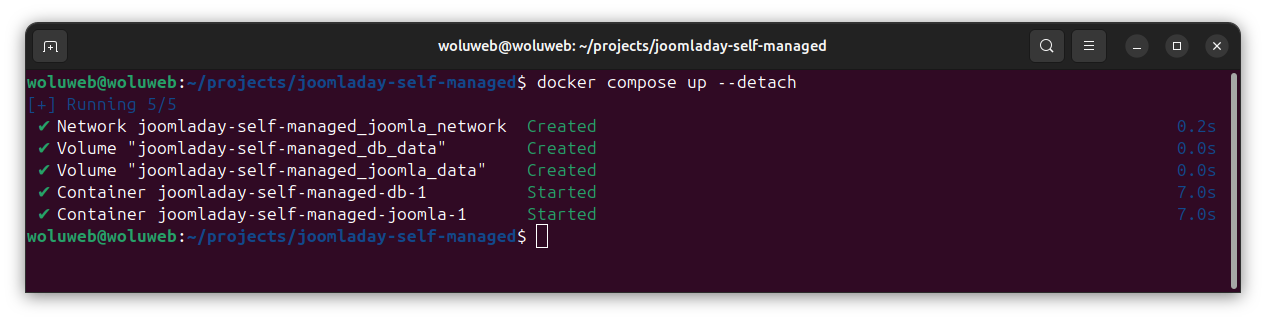
3. Open your Terminal in that given Folder and type the following Command
```bash
docker compose up --detach
```
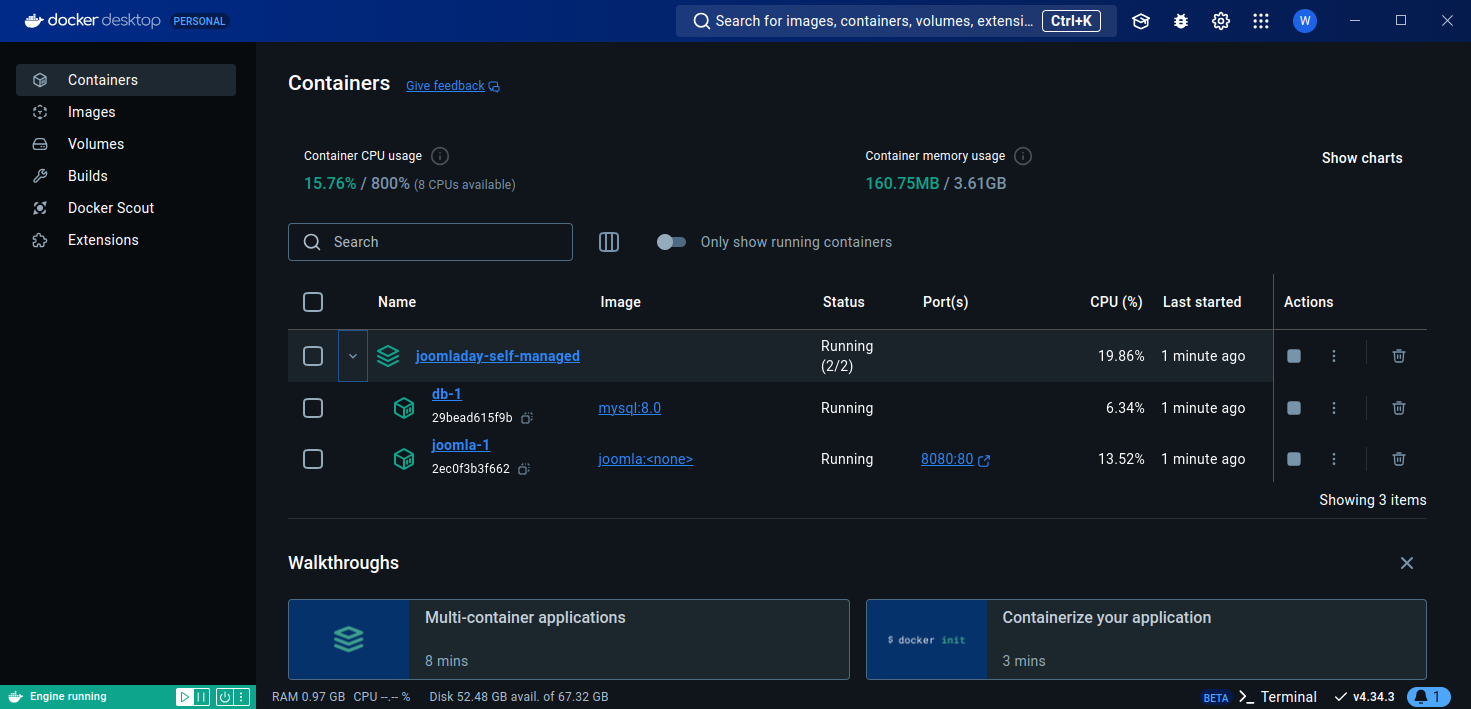
4. In Docker Desktop, you can see when your Containers are ready (it typically needs only a few seconds, except the first time where the different Images also need to be downloaded)
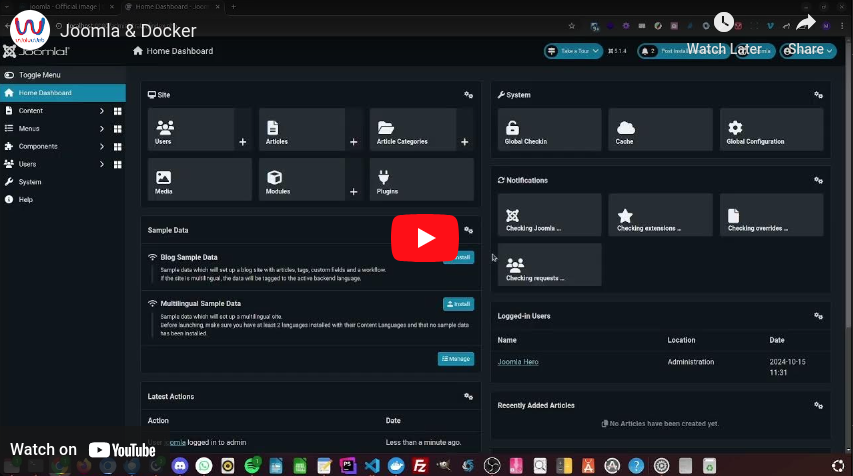
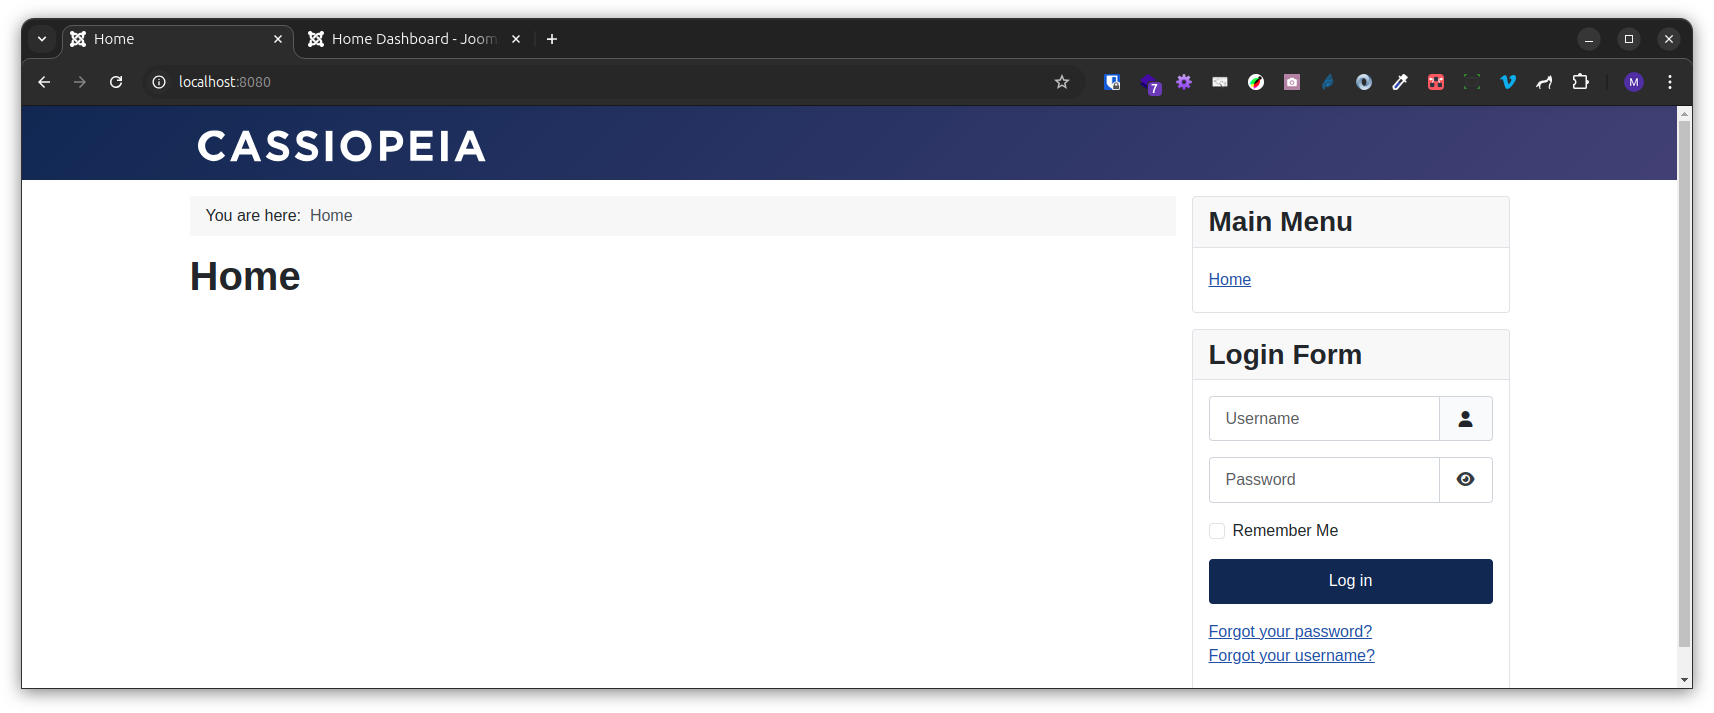
5. Open your browser and go to `localhost:8080` (or `http://127.0.0.1:8080` should localhost not be defined on your computer)... your Joomla website is ready (i.e. even already *installed*! You can log in with the username and password mentioned in the `yaml` file)
Present slides:
This presentation was made at
- JoomlaDay France 2024 #jd24fr
## Introduction
So many times I have seen people struggling on forums or elsewhere to configure a "local server".
Actually, Docker is really the way to go because
- it is not only an easy & cool way to set up a "local server" to play / work with Joomla
- but once you can use it, you realize that it allows to set up any kind of tool / environment in less than 1 minute, without worrying for conflicts / versions / whatever
## Demo
### Prerequisite
Let's suppose you have already installed **Docker Desktop** (or **Docker Engine** if you don't wish/need the Graphical User Interface).
See the detailed installation procedures hereafter.
### Example 1
See the corresponding video:
As you can see, basically all it takes to get a Joomla website running locally is
- one little configuration file that you copy paste
- one command line
[](https://youtu.be/-4WXIXQJWTU)
#### Have Joomla up and running
0. Open Docker Desktop

1. Go to the Official Image for *Joomla* on the Docker website:

2. Copy the `docker-compose.yml` example and save it in a local File called `docker-compose.yml` (or better: `compose.yaml` which is the latest standard) in a newly created Folder


3. Open your Terminal in that given Folder and type the following Command
```bash
docker compose up --detach
```

4. In Docker Desktop, you can see when your Containers are ready (it typically needs only a few seconds, except the first time where the different Images also need to be downloaded)

5. Open your browser and go to `localhost:8080` (or `http://127.0.0.1:8080` should localhost not be defined on your computer)... your Joomla website is ready (i.e. even already *installed*! You can log in with the username and password mentioned in the `yaml` file)
(if all services are not ready yet, in your browser you could have a message like "Unable to connect" or "This site can't be reached". Just be a bit patient and refresh the page)
Notes:
- the `--detach` at the end of our Command means "Detached mode: Run containers in the background". `- d` is its short version
- to know more about `docker compose up`, see
#### File Management
##### See the files within Docker Desktop
Now you probably want to access your Files, for example
- to edit a PHP file like `configuration.php`
- to rename / delete images
- ...
But as you might have noticed, the Joomla and the Database Files are not directly accessible via your regular File Manager. This is because Docker itself is *managing* all files ("self-managed").
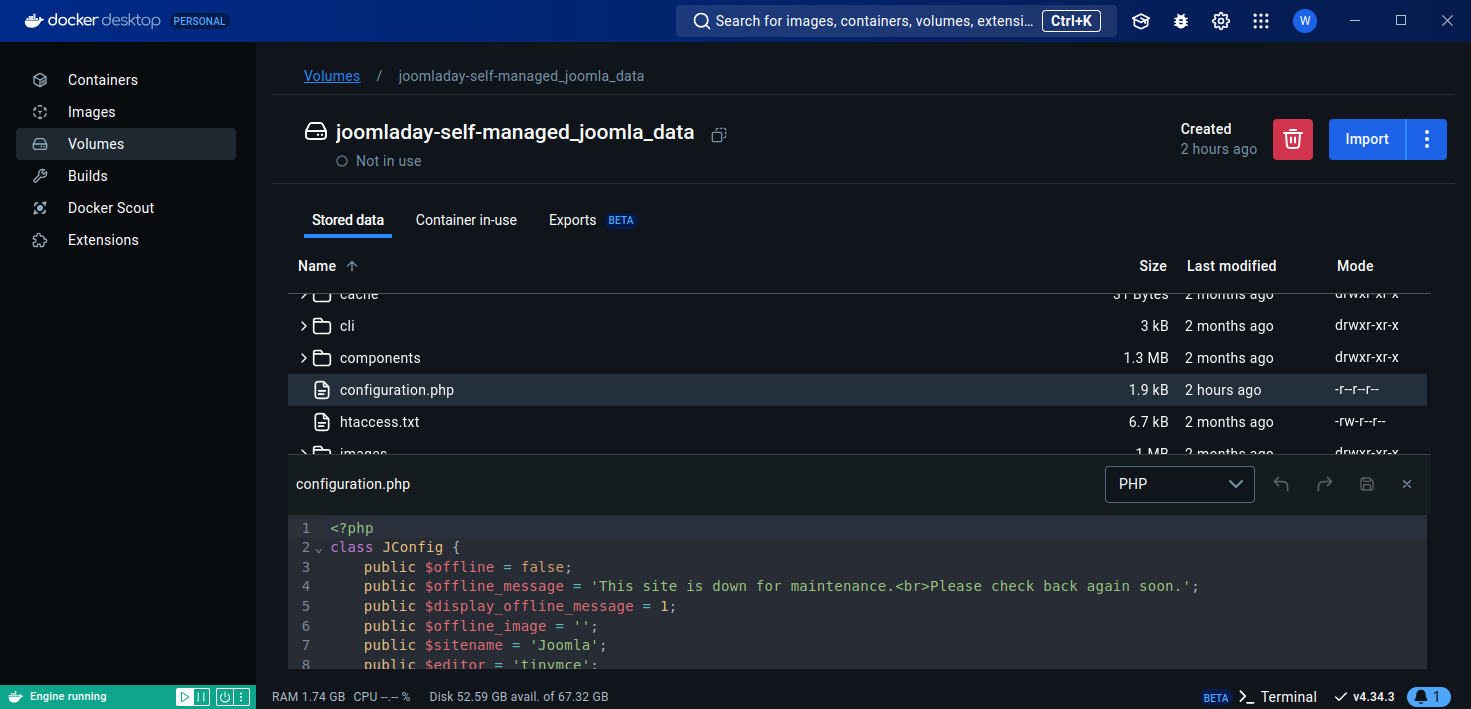
In Docker Desktop > Volumes, you can indeed see
- 1 Volume for `joomla_data`
- 1 Volume for `db_data`
Note: these are the names given arbitrarily in our `yaml` file. You can, of course, give them any name you like!
There you can open each volume, navigate through the folders and even open files. But you cannot *edit* them.
##### Edit the files
To make things easy, simply install
- [Visual Studio Code](https://code.visualstudio.com/Download) (which is free, but feel free to use PHPStorm if you have a licence)
- the following Extensions for Visual Studio Code
- [Docker](https://marketplace.visualstudio.com/items?itemName=ms-azuretools.vscode-docker) by Microsoft
"Makes it easy to create, manage, and debug containerized applications"
- [Dev Containers](https://marketplace.visualstudio.com/items?itemName=ms-vscode-remote.remote-containers) by Microsoft
"Open any folder or repository inside a Docker container and take advantage of Visual Studio Code's full feature set"

Accessing the Folders and Files is now easy
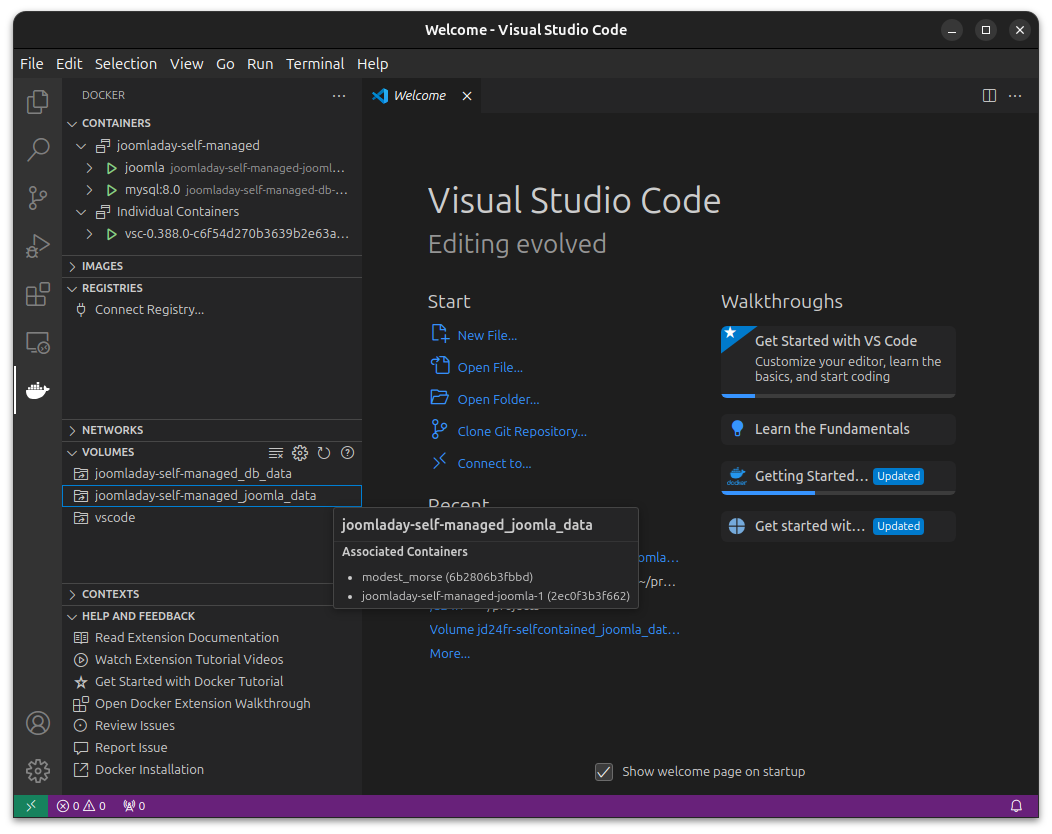
1. Open Visual Studio Code
2. Click on the Docker icon in the left bar (*added by the Docker Extension*). There you see a.o.
- the Containers
- the Images
- the Volumes
- ...
3. Open the Volumes, right-click on `joomla_data` and click on `Explore in a Dev Container` (*added by the Dev Containers Extension*)
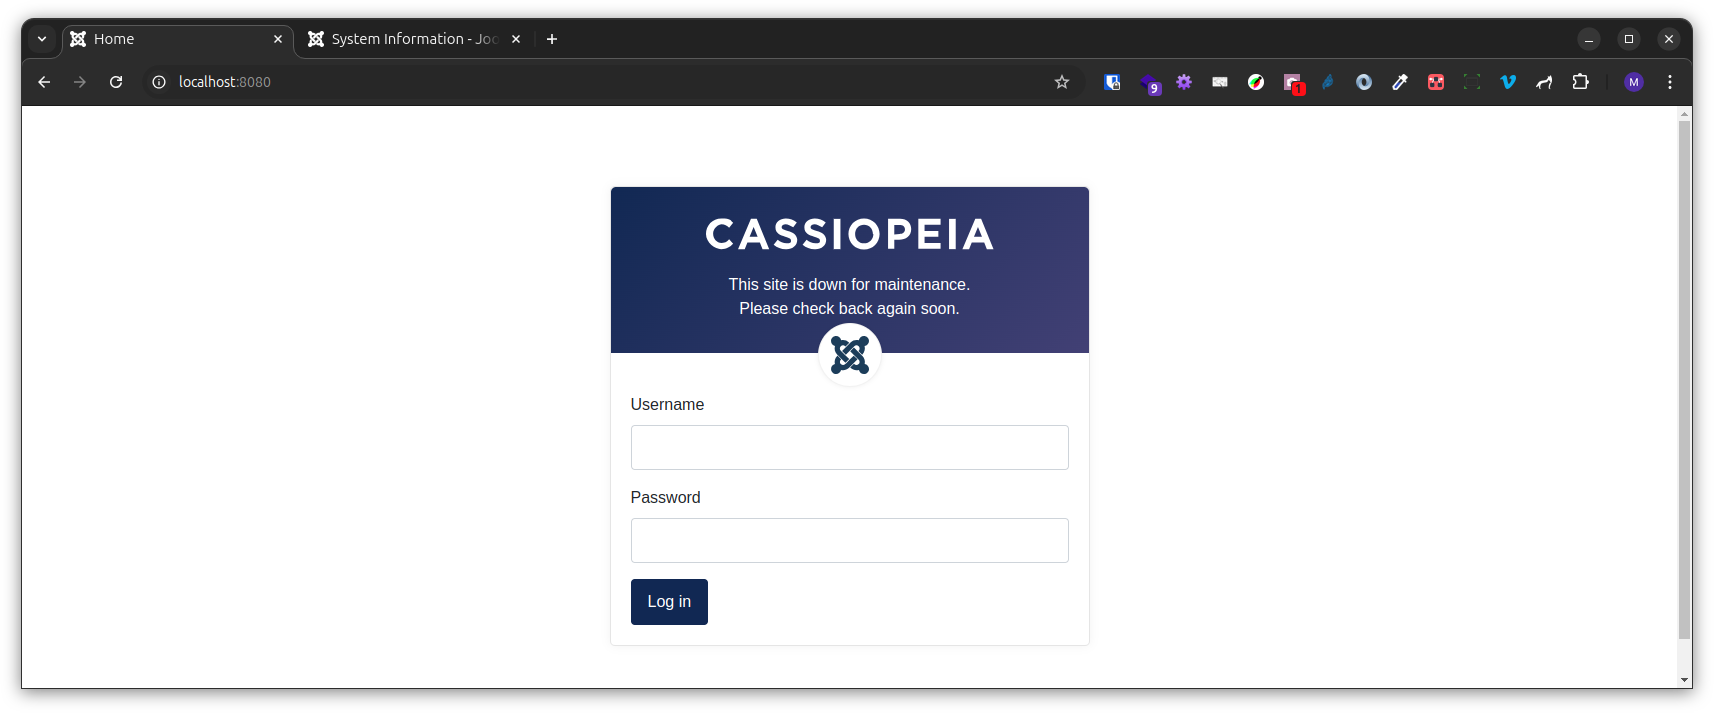
4. Now you can do what you want, for example
4.1. Edit `configuration.php`, change the row `public $offline = false` to `public $offline = true` and save. Now if you refresh your website in your browser `localhost:8080` the website has indeed gone *offline*
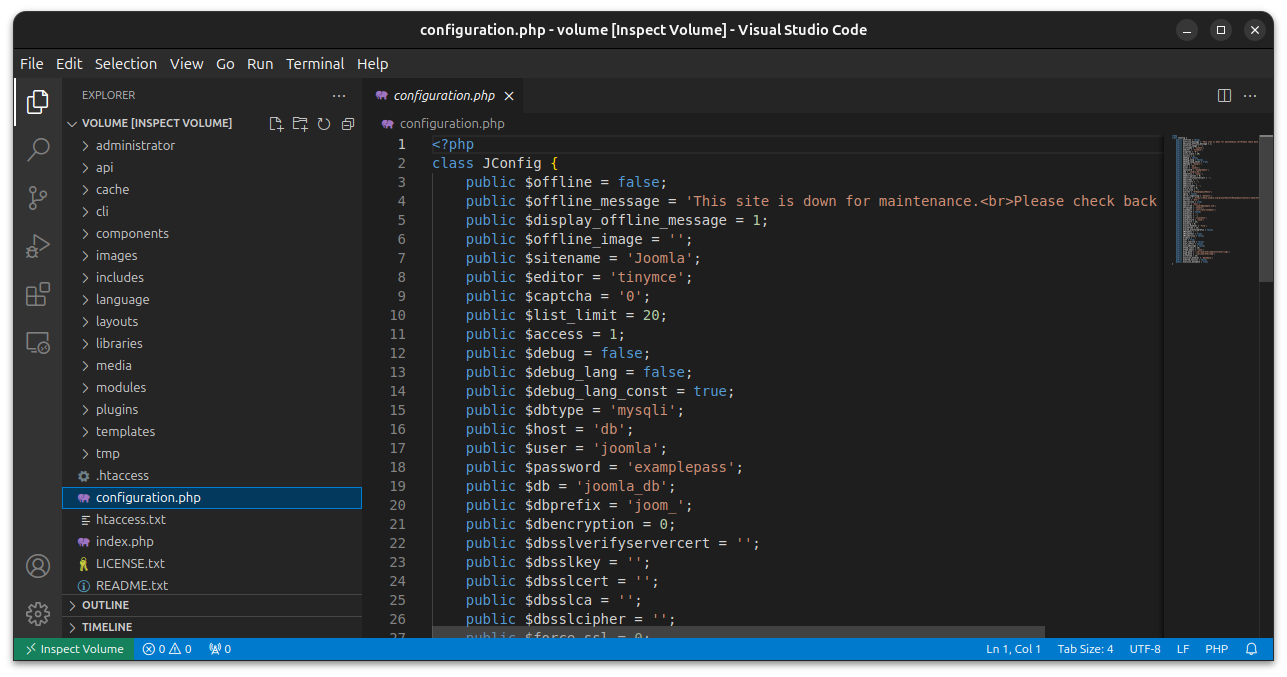

4.2. If you go to Joomla's back-end > Content > Media and upload Images, you will see them in Virtual Studio Code > Explorer
Tip 1: if you have made 1 or several changes to a File (even another day), you can simply go back to any Version simply with Virtual Studio Code: Explorer icon > Timeline
Tip 2: in Virtual Studio Code you also have a Terminal (quite simply to be found under the Terminal menu item)
Tip 3: if you are in your terminal application and want to open Virtual Studio Code *already placed in the current folder*, simply type the following command:
```bash
code .
```
#### Persistence
You can close Docker Desktop any time: when you will reopen it, your website will again be up and running ("persistency").
But if you want to consume less memory, you can "turn off" your containers.
- either via Docker Desktop > Containers: Stop of even Delete
- either via your terminal in that given folder: type the following command: `docker compose down`
After that, whenever you will run again
```bash
docker compose up --detach
```
Your website will be back.
Actually, as long as you don't delete the *Volumes* `joomla_data` and `db_data` your website is still intact, ready to be run.
NB: under Docker Desktop > Images you will find all the Images that you already "downloaded". You can safely delete those files: the only consequence is that they will be downloaded again if your ỳaml`requires them.
### Example 2: customized environment
Let's customize further our setup
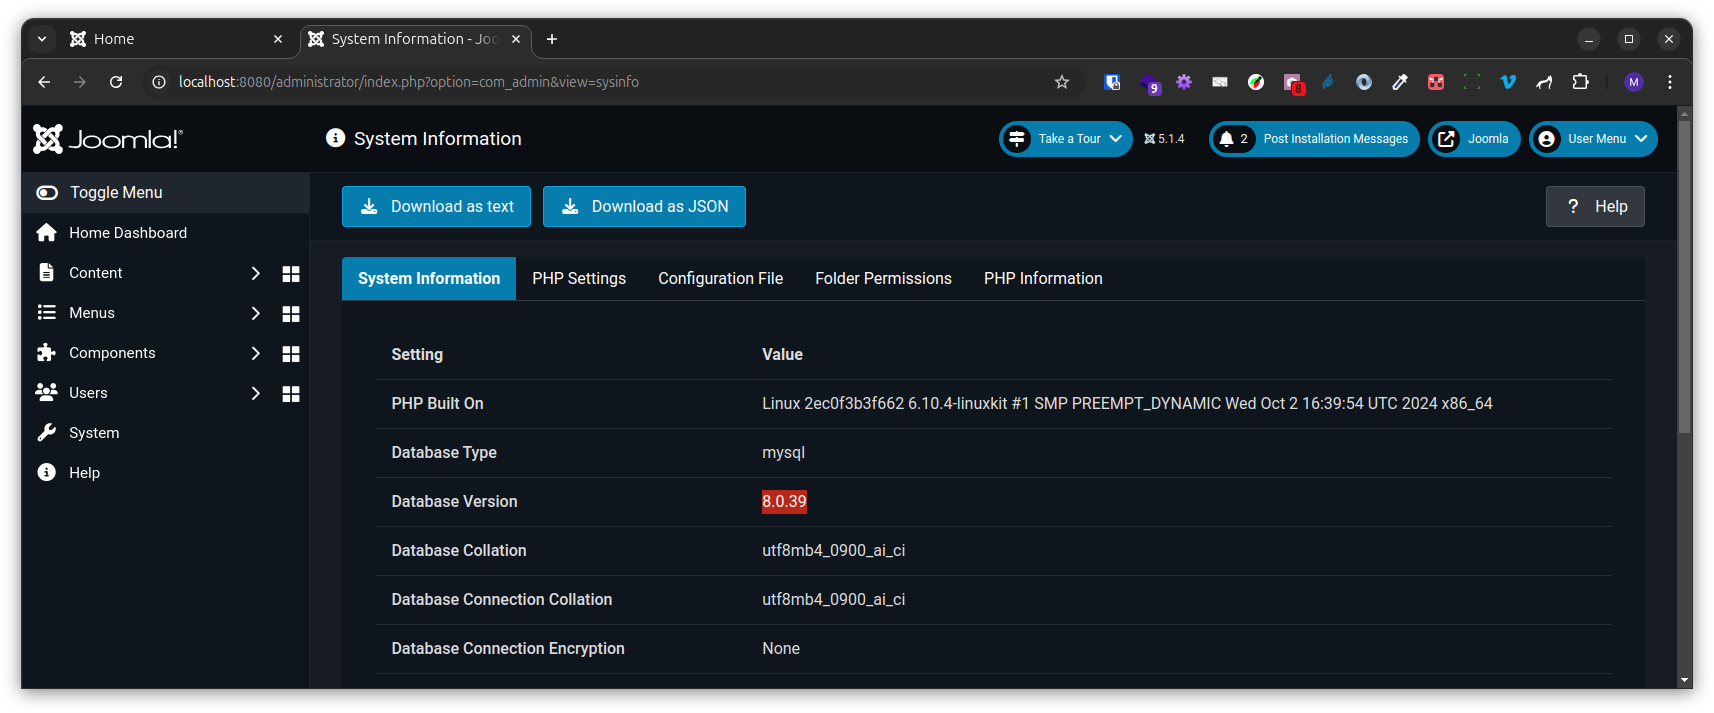
1. by default, we had the *latest stable Joomla Version* and *some given PHP Version*. Let's suppose you want a *specific Joomla Version* and a *specific PHP version*
2. by default, the database engine is *mysql*. Let's suppose you want to use *mariadb* instead
3. by default, the *upload maximum file size* is 2 Mb. Let suppose you want to increase it
Here is how we can easily achieve this
0. just like in the previous example, create a *new folder* with the same file `compose.yaml` (*new folder* because otherwise we will be messing up the previously installed mysql with the newly installed mariadb for example). Then edit that file as follows
1. change `ìmage: joomla` into `image: joomla:5.2-php8.3-apache` if you want Joomla 5.2 with PHP 8.3 (see for all the available Tags)
2. change `image: mysql:8.0` into `image: mariadb:10.5.26` to switch from MySQL 8.0 to MariaDB 10.5.26
3. in order to change the upload maximum file size (or any parameter which belongs typically to php.ini actually)
- create a file called `php.ini` next to `compose.yaml` with the following content :
```ini
upload_max_filesize = 500M
post_max_size = 500M
```
- add the following line `- ./php.ini:/usr/local/etc/php/php.ini` after `- joomla_data:/var/www/html` (keeping the same indentation!)
That's it!
By running `docker compose up --detach` in this folder I will now have my customized environment.
### Example 3: adding PHPMyAdmin
What if we also wanted to have PHPMyAdmin in order to be able to play directly with our database.
The official image is available here:
#### Occasionally
If we only need PHPMyAdmin occasionally then we can just launch it manually any time once your Joomla website is running.
See
#### Systematically
If we want to have PHPMyAdmin systematically then all we have to do is to add a few lines in our `compose.yaml` file.
1. we add the `phpmyadmin` service. Note: we added there a `condition: service_healthy` so that `phpmyadmin` only starts when `db` is ready
2. therefore, in the `db` service we have added a `healthcheck` block
3. and since we have now introduced that `healthcheck` concept, it also makes sense to add the `condition: service_healthy` for the `joomla` service
To know more about Startup Order, see
```yaml
services:
joomla:
image: joomla
restart: always
ports:
- 8080:80
environment:
JOOMLA_DB_HOST: db
JOOMLA_DB_USER: joomla
JOOMLA_DB_PASSWORD: examplepass
JOOMLA_DB_NAME: joomla_db
JOOMLA_SITE_NAME: Joomla
JOOMLA_ADMIN_USER: Joomla Hero
JOOMLA_ADMIN_USERNAME: joomla
JOOMLA_ADMIN_PASSWORD: joomla@secured
JOOMLA_ADMIN_EMAIL: joomla@example.com
depends_on: # new block - cfr the "healthcheck" under the db service
db:
condition: service_healthy
volumes:
- joomla_data:/var/www/html
networks:
- joomla_network
db:
image: mysql:8.0
restart: always
environment:
MYSQL_DATABASE: joomla_db
MYSQL_USER: joomla
MYSQL_PASSWORD: examplepass
MYSQL_RANDOM_ROOT_PASSWORD: '1'
healthcheck: # new block - cfr the "condition: service_healthy" of the "depends_on" block for joomla and phpmyadmin services
test: ["CMD", "mysqladmin" ,"ping", "-h", "localhost"]
timeout: 10s
retries: 10
volumes:
- db_data:/var/lib/mysql
networks:
- joomla_network
phpmyadmin: # new service
depends_on:
db:
condition: service_healthy
image: phpmyadmin/phpmyadmin:latest
restart: always
ports:
- '8081:80'
environment:
PMA_HOST: db
networks:
- joomla_network
volumes:
joomla_data:
db_data:
networks:
joomla_network:
```
Now when you run `docker compose up --detach` you will notice that the `joomla` and `phpmyadmin` services will only start once the `db` service shows "Healthy".
- As previously `http://localhost:8080/` shows Joomla
- And now `http://localhost:8081/` shows PHPMyAdmin
- the port is `8081` because this is what we chose in our `compose.yaml` file
- the credentials to access our database are also defined in our `compose.yaml` file
- MYSQL_USER: joomla
- MYSQL_PASSWORD: examplepass
### Example 4: all the Files in my own File Manager
In the previous example, we saw that even when our volumes (Files) are managed within Docker itself, we can still access them.
But sometimes you really want to have `joomla_data` and `db_data` as regular folders of your computer, so that you can access them directly with your regular File Manager.
#### Prerequisite
Let's suppose **Docker Engine** is already installed (see the detailed installation procedures hereafter).
#### Configuration
1. in a new Folder, create manually the 2 Folders `joomla_data` and `db_data`
We don't let Docker create them so that we are the Owners of those folders. Otherwise Docker will create them and be the owner, creating useless permission issues.
2. in the same Folder, create the following `composer.yaml` File
```yaml
services:
joomla:
image: joomla
restart: always
ports:
- 8080:80
environment:
JOOMLA_DB_HOST: db
JOOMLA_DB_USER: joomla
JOOMLA_DB_PASSWORD: examplepass
JOOMLA_DB_NAME: joomla_db
JOOMLA_SITE_NAME: Joomla
JOOMLA_ADMIN_USER: Joomla Hero
JOOMLA_ADMIN_USERNAME: joomla
JOOMLA_ADMIN_PASSWORD: joomla@secured
JOOMLA_ADMIN_EMAIL: joomla@example.com
user: "1000:1000" # added - use the command id -u and id -g to know your own userid:groupid
volumes:
- ./joomla_data:/var/www/html # added ./ at the start
networks:
- joomla_network
db:
image: mysql:8.0
restart: always
environment:
MYSQL_DATABASE: joomla_db
MYSQL_USER: joomla
MYSQL_PASSWORD: examplepass
MYSQL_RANDOM_ROOT_PASSWORD: '1'
user: "1000:1000" # added - use the command id -u and id -g to know your own userid:groupid
volumes:
- ./db_data:/var/lib/mysql # added ./ at the start
networks:
- joomla_network
# volumes:
# joomla_data:
# db_data:
networks:
joomla_network:
```
Note: anything after the symbol # is a *comment* made to highlight the difference with the original basic `yaml` file, but, of course, all these comments can be deleted.
Compared to the original basic `yaml` file, we have respectively
- in each section called `joomla` and `db`
- added a line for `user:`. Use the command `id -u` and `id -g` to know what is your User Id and your User Group.
In my case (and in many cases) it is `1000` and `1000`. So the full line is `user: "1000:1000"`
- added `./` before each volume, meaning that Docker will point to the current Local Folder
- disabled the `volumes:` section because we are precisely using our own 2 Folders so Docker will not have to "manage" the volumes itself
#### Starting Docker Engine
On some operating systems, like Ubuntu and Debian, the Docker daemon service starts *automatically* when booting.
Otherwise, use the following command to start it manually:
```bash
sudo systemctl start docker
```
See for more details.
#### Execution
Since Docker Engine was executed with `sudo` privileges (i.e. as root user), we also have to use `sudo` on our usual command:
```bash
sudo docker compose up --detach
```
Open your browser and go to `localhost:8080`... your Joomla website is ready.
To close your containers (but keep your website intact), simply do
```bash
sudo docker compose down
```
## Installing Docker Desktop
Let's see how to install Docker Desktop, namely Docker *with* Graphical User Interface
- it is indeed probably easier / more comfortable if you have no/little experience with Docker
- but strictly speaking you can, of course, also always use Docker Engine, namely Docker *without* Graphical User Interface
### on Windows
The best way is to first install WSL2 (Windows Subsystem for Linux)
You will find enough documentation online, for example
-
-
-
### on Linux (Ubuntu, ...)
Let's take the example of Ubuntu.
See
- for Linux in general
- for Ubuntu in particular
Short version :
1. Set up Docker's apt repository as explained on
2. Download the appropriate version, in my case `docker-desktop-amd64.deb`
3. Install
``` bash
sudo apt update
sudo apt install ./docker-desktop-.deb
```
where `` is in my case `amd64` of course.
### Launch Docker Desktop
You can launch Docker Desktop
- either via its icon
- either via the following command line:
```bash
systemctl --user start docker-desktop
```
Note: if you are running Ubuntu 24.04, before launching Docker Desktop you need to run
```bash
sudo sysctl -w kernel.apparmor_restrict_unprivileged_userns=0
```
after each reboot (as explained in the Prerequisites on )
### Docker Desktop - sign in
Creating an account is not necessary but has advantages.
But note: before being able to "Sign in" you need to do the following:
## Installing Docker Engine
### On Ubuntu
Note: when using Docker Desktop *on Ubuntu*, I personally always run into Permission issues. So for this scenario we will now use Docker Engine instead of Docker Desktop [if you can help me having to make it work with Docker Desktop, please get in touch!]. It is also the opportunity to give a try to Docker Engine.
In the case of Ubuntu, the procedure is described here:
Step 1 "Set up Docker's apt repository." was already done above, so I can directly jump to Step 2:
`sudo apt-get install docker-ce docker-ce-cli containerd.io docker-buildx-plugin docker-compose-plugin`
### Manage Docker as a non-root user
If you want to manage Docker as a non-root user please follow those instructions:
Note: in the context of this presentation, we skip this because we will simply manage Docker as root user (using `sudo` preface our Commands)
### A few useful command
```bash
docker volume list
docker container list
```
## Useful Links
There is a "Docker Stuff" group on Joomla's Mattermost:
### Useful Docker Images
-
-
Databases
-
-
-
More generally, see
### Christophe Avonture's presentations around Docker
In English
- part 1
-
-
-
-
-
-
In French #jd22fr
-
### More advanced tools related to Docker & Joomla
#### Octoleo by Llewellyn van der Merwe
#### Joomla Branches Tester by Heiko Lübbe
There is a "Joomla Branches Tester" group on Joomla's Mattermost:
(audio in German - enable Closed Caption and Automatic Translation if needed)
## DPDocker by Allon Moritz
Very useful for Joomla testers and/or developers
### Installation
In a Folder, type
```bash
git clone https://github.com/Digital-Peak/DPDocker.git
```
This creates a DPDocker Folder.
Go to that folder in your terminal.
### Example - testing a Pull Request
One of the Tools of DPDocker is "joomla-pr":
Let's try this. Go to and click on the "Pull Request" Tab.
Identify a Pull Request (PR), for example . So the ID of this Pull Request is 44223
```bash
joomla-pr/run-joomla-pr-webserver.sh 44223 -db mysql -php 8.1
```
Runs the web server for pr 44223 on a mysql database with PHP 8.1.
now shows the website.
Press CTRL+c to Stop the Container.
## Special thanks
On this special occasion, I would like to express my gratitude to Christophe Avonture aka cavo789 for
- having created the Joomla User Group which was my first contact with the Joomla Community
- having pushed me to attend my very first JoomlaDay (which changed my life)
- initiating me to Docker!
## Get in touch
Any suggestion about this presentation?
Please feel free to contact me. I'll be happy to keep improving it 🙂
[Marc Dechèvre](https://www.facebook.com/marc.dechevre) | [woluweb](https://x.com/woluweb)
+32 474 37 13 12 | +32 2 772 58 69